
Blogsite

Coss Svenska

Neue Welle

Thrive Now
Top Freight Brokers in Brisbane: The Best Services for Your Logistics
When it comes to logistics, Brisbane is a major hub for freight movement in Australia. Businesses in need of efficient, reliable, and cost-effective transportation services turn to freight brokerage to find the best options for their logistics needs.

Freight brokers act as intermediaries between shippers and carriers, ensuring that goods are transported efficiently and on time. This article will outline some of the top freight brokers in Brisbane and highlight the best services they offer for streamlining your logistics operations.
What is Freight Brokerage?
Freight brokerage is the process of connecting shippers with carriers that can transport their goods. Freight brokers act as middlemen, managing logistics and ensuring that the transport process runs smoothly.
They work with a network of trusted carriers to offer tailored transportation solutions to businesses. Freight brokers are experts in negotiating rates, handling paperwork, and ensuring compliance with regulations.
In Brisbane, many companies rely on freight brokers to streamline their logistics, reduce costs, and ensure timely deliveries. By partnering with a broker, businesses can focus on their core operations while the broker handles the complexities of freight management.
The Role of Freight Brokers in Brisbane
Freight brokers in Brisbane play a significant role in the logistics industry, helping businesses navigate the complexities of transportation. Their services can be vital for businesses of all sizes, ensuring that goods are moved efficiently across the city, state, and even internationally.
Key Benefits of Using Freight Brokers
- Cost Savings: Freight brokers have extensive knowledge of the logistics market and can negotiate better rates for their clients.
- Access to a Wide Network of Carriers: Brokers have established relationships with multiple carriers, providing shippers with various transportation options.
- Time Savings: Managing logistics can be time-consuming. Freight brokers handle the paperwork, routing, and communication with carriers, saving businesses valuable time.
- Expertise: Freight brokers have specialised knowledge of the industry, ensuring compliance with regulations and smooth transport operations.
Types of Freight Services in Brisbane
There are several types of freight services available in Brisbane, each catering to different needs. Whether you are moving large volumes of goods or handling smaller shipments, there is a freight broker that can offer a solution that fits your requirements.
Full Truckload (FTL) Freight
FTL freight is the most cost-effective option for large shipments that require the entire capacity of a truck. This type of service is ideal for businesses with significant freight needs. Freight brokers specialising in FTL services can help you find carriers with the right equipment to transport your goods safely and efficiently.
Less Than Truckload (LTL) Freight
LTL freight is used for smaller shipments that don’t fill an entire truck. This option allows businesses to share truck space with other shippers, reducing costs. Brisbane freight brokers specialising in LTL services can help you consolidate your shipments with other customers, providing cost savings without sacrificing speed or reliability.
Specialised Freight Services
For businesses dealing with specialised freight, such as oversized or hazardous materials, there are freight brokers in Brisbane who specialise in these areas. Specialised brokers have the knowledge and resources to handle unique transport requirements, ensuring that goods are moved safely and in compliance with all regulations.
How to Choose the Right Freight Broker in Brisbane
Choosing the right freight broker is essential to ensure that your logistics needs are met efficiently and cost-effectively. Here are some factors to consider when selecting a freight broker in Brisbane.
Industry Experience
Experience is one of the most important factors when choosing a freight broker. Look for a broker with a strong track record in the logistics industry and extensive experience in handling freight in Brisbane and surrounding areas. Experienced brokers are more likely to have the knowledge and connections necessary to manage your shipments effectively.
Customer Service
A reliable freight broker will provide excellent customer service. They should be responsive to your needs, transparent about pricing, and proactive in resolving any issues that may arise during the transport process. Ensure that the broker you choose is easy to communicate with and willing to offer support whenever necessary.
Network of Carriers
A strong network of carriers is essential for a successful freight brokerage service. Brokers with a broad network of trusted carriers can offer you more options, whether you’re looking for a specific type of transport or need to ship goods to a remote location. Look for a broker that has established relationships with reliable carriers to ensure timely deliveries and competitive pricing.
Technology and Tracking
Many freight brokers in Brisbane use advanced technology to manage their services. This can include software for tracking shipments, optimising routes, and providing real-time updates. Technology-driven brokers can offer more transparency, which is essential for businesses looking to track their shipments and ensure everything is running smoothly.
Top Freight Brokers in Brisbane
Brisbane has many reputable freight brokers offering a range of services to cater to the diverse needs of businesses. Below are some of the top freight brokers in the city:
1. FreightMatch
FreightMatch is a leading freight broker in Brisbane, offering a wide range of transport solutions. They specialise in both FTL and LTL services and have a broad network of carriers to choose from. Their platform allows businesses to compare quotes, book shipments, and track deliveries online, making the process simple and efficient.
2. Transdirect
Transdirect is another popular freight broker in Brisbane, known for their competitive pricing and efficient service. They offer a variety of freight options, including road, air, and sea freight. Transdirect’s online platform makes it easy for businesses to manage shipments, track deliveries, and get real-time updates on the status of their freight.
3. Toll Group
Toll Group is one of the largest logistics companies in Australia, providing comprehensive freight brokerage services. Their services include road, rail, air, and sea freight, and they offer tailored solutions for businesses across Brisbane. Toll Group is known for its reliable service, advanced technology, and global network, making them a trusted choice for businesses with diverse logistics needs.
4. Mainfreight
Mainfreight is an international logistics company with a strong presence in Brisbane. They provide a full range of freight brokerage services, including air, sea, and road transport. Mainfreight is known for their customer-centric approach, offering businesses flexibility and control over their logistics operations. With their advanced tracking tools and global network, Mainfreight ensures that shipments are handled efficiently.
5. Centurion Transport
Centurion Transport has been serving the Australian market for over 50 years, providing freight brokerage services to businesses across Brisbane. They offer specialised services for industries such as agriculture, construction, and mining. Centurion Transport has a fleet of vehicles suited for various types of freight, including flatbed trucks, refrigerated trucks, and more.
Frequently Asked Questions
What services do freight brokers offer?
Freight brokers offer a wide range of services, including negotiating transport rates, managing logistics, ensuring compliance with regulations, and providing access to a network of trusted carriers.
How can a freight broker save me money?
Freight brokers can negotiate better rates with carriers, consolidate shipments, and provide cost-effective solutions for transporting goods, ultimately saving businesses money.
Are freight brokers licensed in Brisbane?
Yes, freight brokers in Brisbane are required to be licensed and comply with local and federal regulations to ensure safe and legal transportation of goods.
Conclusion
Selecting the top freight brokers in Brisbane is key to optimising your logistics operations. Whether you need full truckload services, less-than-truckload options, or specialised freight solutions, there are reputable brokers available to meet your needs. By partnering with a reliable freight broker, you can streamline your logistics, reduce costs, and ensure timely delivery of goods.
A Complete Guide to Choosing the Right Removalists for Your Move
Moving homes is a significant life event that requires careful planning and organisation. Whether you’re relocating within the same city or across the country, finding the right removalists is essential to ensure that your belongings are transported safely and efficiently.

With so many moving companies available, it can be challenging to choose the right one for your needs. In this guide, we’ll walk you through everything you need to know about choosing the right removalists for your move, from understanding their services to comparing quotes.
For those in the Melbourne area, removalists Melbourne are available to meet your moving needs.
Understanding Removalist Services
The first step in choosing the right removalists is to understand the various services that removalist companies offer. Not all moving companies provide the same level of service, and some may specialise in specific types of moves, such as local, interstate, or commercial moves.
Key Services Offered by Removalists
- Packing Services: Some removalists offer packing services where they’ll pack your belongings for you. This can include providing boxes, bubble wrap, and other packing materials to ensure your items are safely transported.
- Loading and Unloading: Loading your belongings onto the truck and unloading them at your new location is one of the core services removalists provide.
- Furniture Disassembly and Reassembly: Removalists can disassemble large furniture, such as beds, tables, and wardrobes, and reassemble them at your new home. This service is especially useful if you have large or bulky furniture.
- Storage Solutions: If there’s a gap between when you move out and when you can move into your new home, many removalists offer short-term storage services.
- Specialised Handling: For items such as antiques, artwork, and pianos, some removalists provide specialised services to handle and transport these fragile or heavy items safely.
Factors to Consider When Choosing Removalists
Selecting the right removalist company involves more than just comparing prices. Several factors need to be considered to ensure that you hire a trustworthy, efficient, and reliable service.
Experience and Reputation
The experience and reputation of a removalist company are key indicators of their reliability. Removalists with years of experience in the industry are likely to handle your items with care, as they have the skills needed to deal with various types of moves. Look for customer reviews and testimonials online to get a sense of their reputation. Word-of-mouth recommendations from friends and family can also help in your search.
Insurance and Licensing
It’s essential to hire removalists that are fully licensed and insured. A reputable company will provide insurance to cover any potential damage or loss during the move. You should always ask about the types of insurance they offer, including basic and full-value protection, and ensure that they meet your requirements.
Services and Specialisations
When comparing removalists, be sure to check if they offer the services you need. For example, if you have fragile items like glassware or artwork, you may want a company that specialises in packing and transporting delicate items. Similarly, if you’re moving long distances or need temporary storage, ensure that the removalists you choose have the necessary facilities and services to accommodate your needs.
Getting the Right Quote from Removalists
Once you have shortlisted a few removalists, it’s time to get quotes. A detailed, transparent quote will help you compare prices and services to ensure you’re getting the best deal for your move.
Request Multiple Quotes
To make sure you’re getting a fair price, request quotes from at least three removalist companies. This will give you a better idea of the price range for your move. Make sure each quote is detailed and includes all potential costs, such as labour, fuel, packing materials, and any additional fees.
Understanding What’s Included in the Quote
Some companies may offer a low initial quote but then add hidden fees, such as charges for stairs, parking permits, or long carry distances. Be sure to ask about any extra charges that might apply. A reputable company will provide a clear breakdown of the services included in their quote.
In-Home Survey for Accurate Quotes
For larger or more complicated moves, it’s best to arrange for an in-home survey. During the survey, the removalists will assess the size and scope of your move, including the amount of furniture and boxes to be moved, any special requirements, and the distance to your new home. This will help them provide a more accurate quote and avoid unexpected costs later on.
Questions to Ask Removalists
Before you finalise your choice, it’s important to ask removalists a few key questions to ensure you are getting the best service for your needs.
What Type of Insurance Do You Offer?
Ensure that the removalist company provides insurance coverage for your belongings during transit. Ask them to explain the details of their insurance policy, including the level of coverage and any exclusions. This will give you peace of mind in case of damage or loss.
How Do You Handle Fragile or Valuable Items?
If you have fragile or high-value items, such as antiques or electronics, it’s important to know how the company will handle them. Ask the removalists about their procedures for packing and transporting delicate items and whether they provide specialised equipment, such as padding or crates, for protection.
What Is Your Estimated Timeframe?
Make sure to ask how long the moving process will take. Get a clear timeframe for when the removalists will arrive, when the move will be completed, and when your items will be delivered to your new home. If you are moving long-distance, ask for an estimated delivery date so you can plan accordingly.
How to Prepare for Moving Day
Preparing for moving day can make the entire process more efficient and less stressful. Here are a few tips to help you get ready for the arrival of the removalists.
Declutter Before the Move
Moving is the perfect opportunity to declutter your home. Sort through your belongings and decide what you no longer need or want. This will reduce the amount of furniture and items the removalists need to move, saving you time and money.
Pack Your Items
If you’re handling your own packing, make sure to pack your items carefully and label boxes clearly. For fragile items, use bubble wrap and sturdy boxes to ensure protection. If you’re hiring the removalists for packing services, be sure to inform them of any delicate or special items that require extra care.
Prepare Your New Home
Before the removalists arrive, make sure your new home is ready for the move. This might include ensuring that parking is available for the truck, clearing pathways, and ensuring that there are no obstacles or hazards in the way.
The Benefits of Hiring the Right Removalists
Hiring the right removalists can make your move significantly smoother and more efficient. Some of the key benefits include:
Expert Handling of Your Belongings
Experienced removalists know how to properly handle furniture and delicate items to prevent damage. They have the expertise and equipment to ensure your belongings are safely transported to your new home.
Stress-Free Experience
Moving can be stressful, but hiring professional removalists can help reduce the burden. From packing and loading to transporting and unloading, the removalists will handle all the heavy lifting, allowing you to focus on other aspects of your move.
Time and Cost Savings
While hiring removalists does come at a cost, it can actually save you time and money in the long run. With their experience and efficiency, professional movers will complete your move much faster than if you were to do it yourself, saving you both time and potentially costly mistakes.
Frequently Asked Questions
How much does it cost to hire removalists?
The cost of hiring removalists depends on several factors, including the size of the move, the distance, and the services you require. On average, local moves can cost between $100 to $150 per hour, while long-distance moves may range from $1,000 to $5,000 or more.
Do I need to provide packing materials for the move?
Many removalist companies provide packing materials as part of their services. However, if you’re packing on your own, you’ll need to purchase boxes, tape, and other materials. If you have valuable or fragile items, it’s best to use high-quality packing materials.
How far in advance should I book my removalists?
It’s best to book your removalists at least two to three weeks before your move, especially during peak moving seasons. Booking in advance ensures you get your preferred moving date and allows the company to make the necessary arrangements.
Conclusion
Choosing the right removalists for your move is essential to ensuring that the process goes smoothly and your belongings are safe. By considering factors such as experience, reputation, insurance, and services offered, you can make an informed decision. Whether you’re looking for removalists Melbourne or anywhere else in Australia, the right company will make your move more efficient, less stressful, and cost-effective.
Microwave Leakage Testing: What You Need to Know
Microwave ovens have become a crucial part of daily life, whether at home, in the office, or in industrial kitchens. However, while they are indispensable, ensuring their safe use is equally important.
Microwave leakage testing is one of the most effective ways to ensure that microwave ovens do not emit harmful radiation. This type of testing helps identify any potential leakage of microwave radiation, which, if left undetected, could pose serious health risks.

For individuals and organisations, such as those associated with the Belgravia Foundation, understanding the need for microwave leakage testing is essential to maintaining safety standards.
This article will guide you through everything you need to know about microwave leakage testing, from the importance of the test to how it’s conducted and how often it should be done.
Why Is Microwave Leakage Testing Important?
Microwave ovens are designed to contain radiation within their sealed structure, preventing exposure to the surrounding environment.
However, over time, wear and tear can compromise their safety. Issues like faulty door seals or damaged components can lead to microwave radiation leakage.
While small amounts of radiation are generally harmless, prolonged or high levels of exposure can lead to health problems, particularly affecting the eyes and tissues.
Microwave leakage testing ensures that microwave ovens remain safe to use, protecting individuals from potential health hazards like burns or eye damage.
Without regular testing, there is a risk that a microwave could be emitting radiation levels above the safe threshold, which may not be immediately apparent. Regular testing helps to identify these issues early, preventing accidents before they occur.
Health Risks of Microwave Radiation Exposure
Although microwave radiation is non-ionising and does not carry the same risks as ionising radiation (like X-rays), long-term or high-level exposure to microwave radiation can cause health issues.
For example, prolonged exposure can cause damage to the eyes, potentially leading to cataracts or other vision problems.
Additionally, excessive exposure to microwave radiation can cause burns or other tissue damage, particularly in the eyes, which are more sensitive to this type of radiation.
Given these potential risks, it is essential to ensure that microwave ovens are tested for radiation leakage regularly, especially in commercial or high-usage environments.
How Microwave Leakage Testing Works
Microwave leakage testing involves using a specialised tool known as a microwave leakage detector. This instrument measures the amount of microwave radiation that escapes from the oven, ensuring that it is within the safe levels prescribed by regulatory bodies.
Visual Inspection
Before using a microwave leakage detector, a technician will perform a visual inspection of the appliance. The technician will check the condition of the microwave’s door seals, hinges, and overall structure.
These parts are critical for containing radiation, and any damage to them could lead to leakage. The inspection will also check for cracks or dents in the microwave that could compromise its integrity.
Measuring Radiation Leakage
Once the visual inspection is complete, the microwave leakage detector is used to measure any radiation escaping from the microwave.
The microwave is turned on, and the technician places the detector at various points on the microwave, particularly near the door seals and other vulnerable areas.
The device will detect and measure the intensity of radiation emitted. If the radiation levels are within the safe limit, the microwave is considered safe for use. However, if the leakage exceeds the regulatory limit, the appliance may require repair or replacement.
Documenting Results
After the test is complete, the technician will document the results. The report will typically include the leakage readings, the location of any problematic areas, and any recommended repairs or actions.
This report serves as an important record for ensuring the microwave’s safety over time.
How Often Should Microwave Leakage Testing Be Done?
The frequency of microwave leakage testing depends on the appliance’s age, usage, and environment. For most household microwaves, testing should be done every one to two years.
However, if the microwave shows signs of wear, such as damage to the door seal or hinges, it should be tested immediately.
In commercial or industrial settings, where microwaves are used frequently, it is recommended to conduct testing more regularly. For example, testing every six months to a year is appropriate for high-usage environments like kitchens in restaurants or factories.
Regular testing is also essential when a microwave is moved or repaired, as any changes could potentially affect its ability to contain microwave radiation.
Legal Requirements and Standards for Microwave Leakage
In Australia, safety regulations regarding microwave radiation are strictly enforced. Regulatory bodies such as ARPANSA (Australian Radiation Protection and Nuclear Safety Agency) have set safety standards to ensure microwave ovens do not emit harmful levels of radiation.
According to ARPANSA guidelines, the maximum allowable leakage from a microwave oven is 5 milliwatts per square centimetre at a distance of 5 centimetres from the surface of the oven.
These standards are in place to protect users from the potential dangers of microwave radiation. Regular microwave leakage testing ensures that ovens comply with these standards and are safe for use.
Businesses that fail to comply with these regulations could face penalties or legal issues, making it even more important to perform regular testing.
The Benefits of Microwave Leakage Testing
Regular microwave leakage testing offers several benefits, particularly in terms of safety, compliance, and efficiency. By identifying problems early, you can address them before they become major issues, saving money on repairs and avoiding safety incidents.
Safety and Health
The primary benefit of microwave leakage testing is improved safety. By ensuring that microwave ovens are not emitting harmful radiation, you protect users from potential health risks.
Regular testing reduces the chances of exposure to dangerous levels of microwave radiation, which could lead to eye damage, burns, or other health problems.
Compliance with Regulations
For businesses and institutions, compliance with safety regulations is not only a legal requirement but also an ethical responsibility.
Regular microwave leakage testing ensures that your appliances meet the required standards and are safe for use, helping businesses avoid potential legal consequences or fines.
Cost-Effective Maintenance
Identifying and addressing microwave issues early can prevent costly repairs or replacements down the line.
Faulty microwaves that are not properly maintained can develop more severe issues over time, leading to higher repair costs or the need for complete replacement. Regular testing helps identify minor issues before they escalate.
Extended Appliance Lifespan
Microwave leakage testing can also extend the life of your appliance. By catching minor issues early and maintaining the microwave properly, you reduce the likelihood of breakdowns and ensure the appliance lasts longer, offering better value for money.
When to Call for Microwave Leakage Testing
Microwave leakage testing should be scheduled regularly as part of routine appliance maintenance. However, there are certain circumstances when you should consider immediate testing:
- When a microwave shows signs of wear or damage: If the microwave door is cracked, the seals are worn, or the hinges are misaligned, you should test the microwave right away to ensure it is still safe to use.
- After repairs or servicing: If a microwave has been repaired or moved, it should be tested to ensure no damage occurred during the process that could affect its radiation containment.
- In high-usage environments: Commercial kitchens or workplaces where microwaves are used frequently should schedule testing every six months to a year to ensure safety.
Frequently Asked Questions
How often should I test my microwave for leakage?
Microwave leakage testing should be done every 1 to 2 years for residential microwaves. However, for microwaves used in commercial or high-traffic environments, testing should be conducted more frequently, such as every six months.
What happens if my microwave fails the leakage test?
If your microwave fails the leakage test, it should be repaired or replaced to ensure that it is safe to use. Faulty door seals or damaged components may need to be replaced to stop microwave radiation from leaking.
Can I perform microwave leakage testing myself?
While there are consumer-grade devices available, it is recommended to hire a professional with the right equipment and expertise to ensure accurate and reliable microwave leakage testing.
Conclusion
Microwave leakage testing is an essential process for ensuring the safety and efficiency of microwave ovens. By identifying potential risks early, users can avoid health hazards, comply with regulations, and extend the lifespan of their appliances.
Whether at home or in a business setting, regular testing is vital for preventing accidents and maintaining a safe environment.
If you’re unsure about how to conduct this testing or need professional assistance, organisations like Belgravia Foundation can help ensure that your microwave ovens remain safe to use.
Tracking Investment Property Performance: Why Spreadsheets Don’t Cut It?
Tracking investment property performance is essential for maximising returns and managing risks. As a property investor, you need to monitor key metrics such as rental income, maintenance costs, property appreciation, and cash flow to make informed decisions.
While spreadsheets have been a long-standing tool for property investors, they simply do not provide the efficiency, accuracy, or scalability required for successful property management. This is where an investment property app becomes indispensable.

In this article, we will discuss why spreadsheets fall short when tracking property performance and how an investment property app can help streamline your investment strategy.
By the end, you’ll understand why relying on spreadsheets might be holding you back and how technology can improve the management of your investments.
The Limits of Using Spreadsheets for Property Tracking
Spreadsheets have been a go-to tool for property investors for decades. They are versatile and can be tailored to meet specific needs.
However, when it comes to tracking the performance of investment properties, spreadsheets often present several limitations that can hinder your ability to make informed, timely decisions.
Lack of Real-Time Data
One of the primary issues with spreadsheets is that they require manual data entry, which means they are not updated in real time. This can lead to outdated information, especially when tracking payments, maintenance requests, or rental incomes.
Real-time data is critical for making quick decisions in the property investment space, and spreadsheets cannot provide this level of efficiency.
Error-Prone Process
Spreadsheets are prone to human error, particularly when dealing with large sets of data. A simple typo or miscalculation can throw off your entire financial analysis. Over time, these errors can compound, leading to significant misjudgements in investment strategies.
Limited Analytics and Reporting
While spreadsheets can store data, they don’t offer advanced analytics or reporting capabilities. Extracting insights from large datasets can be time-consuming and requires manual effort to create custom reports.
Investors may miss important trends, such as declining rental yields or increasing maintenance costs, which are key indicators of a property’s performance.
Difficulty in Scaling
As your property portfolio grows, managing multiple spreadsheets becomes cumbersome and inefficient. Tracking performance across several properties using individual spreadsheets makes it difficult to maintain an overview of your entire portfolio.
Spreadsheets can’t easily consolidate data from multiple properties, leading to fragmented information and missed opportunities.
Why You Need an Investment Property App
An investment property app offers a modern solution to the shortcomings of spreadsheets. These apps are specifically designed to track property performance and provide insights into your investments.
Let’s explore how an investment property app can address the limitations of spreadsheets.
Real-Time Data Updates
Unlike spreadsheets, an investment property app is designed to provide real-time data updates. Whether it’s rental income, occupancy rates, or maintenance costs, these apps automatically sync with your financial and property management systems.
This real-time data allows you to stay on top of your investments and react quickly to any changes in the market or your properties.
Automation and Reduced Errors
One of the main advantages of an investment property app is automation. From rent collection to maintenance management, these apps automate time-consuming tasks and reduce the risk of human error. For example, when a tenant makes a payment, the app will automatically update your records, and you won’t have to manually input data.
Automation helps improve accuracy and reduces the likelihood of costly mistakes.
Advanced Analytics and Reporting
Investment property apps often come with built-in reporting and analytics tools that provide deeper insights into your portfolio’s performance. These apps can automatically generate financial reports, track trends, and provide forecasts based on historical data.
The ability to analyse your investments in real time allows you to make more informed decisions and identify areas for improvement.
Scalable and Easy to Manage
For investors with a growing property portfolio, scalability is a significant advantage of using an investment property app. Instead of managing multiple spreadsheets for each property, an investment property app consolidates all your data into a single, centralised platform.
This makes it easier to track the performance of your entire portfolio and identify which properties are underperforming or excelling.
Key Features of an Investment Property App
When choosing an investment property app, there are several features you should look for to ensure it meets your needs. Here are some of the key functionalities to consider:
Financial Tracking and Cash Flow Management
The app should allow you to track all aspects of your property’s financial performance, including income, expenses, mortgage payments, and maintenance costs.
By providing a clear overview of your cash flow, the app enables you to identify potential cash shortages and make adjustments as needed. This feature can also help you stay on top of tax obligations by keeping your financial records organised.
Rent Collection and Payment Management
An investment property app should offer a feature for managing rent collection and tracking tenant payments. This function allows you to set up automated reminders for tenants, reducing late payments and improving cash flow.
Additionally, the app can generate invoices and receipts, making it easier for tenants to pay and for you to track payments.
Maintenance Tracking and Management
Property maintenance is an ongoing task for any investor. An investment property app can help by allowing tenants to submit maintenance requests directly through the app.
These requests can then be tracked, and you can assign contractors or maintenance teams to resolve issues. This centralised system ensures that nothing falls through the cracks and helps you manage repairs more efficiently.
Document Storage and Management
Another useful feature of an investment property app is document storage. You can store important documents, such as lease agreements, property inspection reports, and tax records, within the app.
This makes it easy to access and organise your documents without having to sift through piles of paperwork or search through various files.
Data Security and Backup
An investment property app ensures that your data is secure and backed up regularly. Unlike spreadsheets, which are vulnerable to data loss due to hardware failure or human error, apps offer cloud-based storage with secure access controls.
This provides peace of mind knowing that your investment records are safe and retrievable if needed.
How to Choose the Right Investment Property App
Choosing the right investment property app is crucial to the success of your investment strategy. Here are some factors to consider when selecting the best app for your needs:
Ease of Use
The app should be user-friendly, even for those without technical expertise. Look for an app with an intuitive interface and clear navigation. An easy-to-use app will save you time and ensure that you can quickly access the information you need.
Customisation and Flexibility
Different investors have different needs, so it’s important to choose an app that can be customised to suit your investment strategy. Look for apps that allow you to track multiple properties, set custom alerts, and generate personalised reports.
Integration with Other Tools
If you already use accounting, property management, or other business tools, ensure the investment property app can integrate with them. Integration streamlines data transfer and ensures that all your systems are aligned and working efficiently.
Pricing and Support
Consider the cost of the app and ensure it fits within your budget. Many apps offer different pricing tiers based on features, so choose one that offers the best value for your specific needs. Also, make sure the app provides reliable customer support to assist you in case of any issues.
Frequently Asked Questions
Why should I move from spreadsheets to an investment property app?
Spreadsheets are error-prone, time-consuming, and lack the features needed to track investment property performance effectively.
Can an investment property app track both rental income and expenses?
Yes, most investment property apps allow you to track both rental income and expenses. This feature helps you manage cash flow and generate accurate financial reports, making it easier to evaluate your property’s performance.
Is an investment property app suitable for both small and large property portfolios?
Yes, investment property apps are designed to scale with your needs. Whether you have one property or multiple, the app consolidates data in one place, making it easier to track performance and manage your portfolio.
Conclusion
Tracking investment property performance is essential for achieving long-term success in real estate. While spreadsheets have served investors for many years, they simply don’t offer the efficiency, accuracy, or scalability required for modern property management.
By switching to an investment property app, you can streamline your operations, reduce errors, and gain deeper insights into your investments.
With the right app, you can make more informed decisions and better manage your property portfolio, leading to improved returns and success in your real estate ventures.
Understanding Cultural Traditions in End‑of‑Life Ceremonies
End‑of‑life ceremonies carry profound symbolic weight across cultures. When planning or participating in a farewell, respecting and understanding cultural traditions in end-of-life ceremonies can lead to more meaningful, inclusive, and honouring services.
Guidance from experienced celebrants such as Peter Tziotis underscores how sensitive design choices, rituals, and inclusions help families bridge grief and heritage.

In this article, we examine how different traditions shape farewells, what elements may require accommodation in multicultural settings, and how to plan respectfully.
Culture, religion, ethnicity, and local practices each contribute to how a community says goodbye.
Knowing the meanings behind rituals helps you avoid missteps, and ensures that ceremonies respect beliefs while serving the departed and the living.
Why Cultural Traditions Matter in Farewells
Cultural rituals communicate beliefs about life, death, and the afterlife. Whether through prayers, incense, chanting, water, flowers, or food offerings, these elements carry theological or spiritual significance.
Traditions connect individuals to community and ancestors. In many cultures, farewells are not private affairs but communal events with shared roles, responsibilities and mourning. Participants feel part of a long line of heritage, reinforcing memory and belonging.
When rituals mirror longstanding practices, they can bring emotional grounding. In grief, familiar rites help people feel less disoriented. A known structure or symbol offers anchor points during emotional turbulence.
Examples of Cultural Traditions Around the World
Indigenous Australian Mourning Practices
Among Indigenous Australian communities, death rituals often include a period of mourning, smoking ceremonies, or songlines.
The land, ancestors, and spiritual connection to country are invoked. Items belonging to the deceased may be ritually handled or buried near landforms. The emphasis is on returning to Country and acknowledging the link between the person and place.
Buddhist Funerary Traditions
In many Buddhist cultures, farewells involve chanting, incense, and merit transfer. Monks or Dharma practitioners may lead recitations, and offerings are made to benefit the deceased’s spirit.
Temples often host ceremonies. The tradition emphasises impermanence, compassion, and karmic continuation.
Hindu Cremation and Mourning
Hindu traditions often call for cremation, with specific rituals at burning grounds. Offerings, water, fire, and recitations are central.
Family members may perform rites (like placing rice or ghee into the fire). Mourning periods follow, during which garments, food practices, and visits are regulated. The belief in rebirth and continuity shapes the choices.
Jewish Burial Customs
Jewish tradition values burial over cremation in many cases. Immediate burial—often within 24 hours—is encouraged.
Ritual washing (taharah), shrouding (tachrichim), and sitting shiva (seven‑day mourning) are central. Community participation is common, and a stone placed on graves is meaningful. There is dignity and equality in simple caskets.
Christian and Catholic Services
Christian ceremonies often include readings, hymns, prayers, funeral mass or memorial service, committal and burial or cremation.
Symbols such as crosses, anointing oils or holy water may appear. The emphasis is on resurrection, hope, and comfort. Traditions vary by denomination and culture.
Challenges in Multicultural or Plural Ceremonies
Harmonising Different Rituals
When participants come from multiple traditions, combination ceremonies may risk overshadowing or diluting meaning.
Balance requires consulting representatives, selecting shared elements, and sequencing rituals so each tradition is honoured. The goal is not hybrid confusion but respectful weaving.
Avoiding Offence Through Misuse or Omission
Misplacing or misusing sacred symbols, using disrespectful music, or omitting key rites out of ignorance can hurt more than absence. Rituals that outsiders view as aesthetic may carry deep spiritual weight. If uncertain, ask cultural or religious elders.
Logistical and Venue Constraints
Not all venues accommodate burning incense, open flames, certain food offerings, or extended gatherings.
Timing, capacity, and regulations (fire safety, sound) may conflict with ritual demands. Early planning and vendor flexibility are essential to preserve tradition within constraints.
How to Plan a Culturally Sensitive Ceremony
Research or Consult with Cultural Custodians
When designing a farewell, engage knowledgeable community elders, faith leaders, or family cultural custodians.
Ask about mandatory elements, taboo items, preferred sequence, symbolism, language, music, attire and participant roles. Their guidance ensures authenticity and avoids missteps.
Document Non-Negotiables
During planning, ask the family what traditions are non-negotiable. Maybe it’s a full chanting period, seating arrangement, or symbolic item. List those and build the arrangement around them. Other items can be flexible, but core rituals merit priority.
Build Inclusive Space for Observers
Allow flexibility in the program—some guests may not share religious or cultural views but want to pay respects. Include explanatory words, optional participation points, or quieter transition times. That ensures both cultural integrity and openness.
Prepare Scripts, Readers and Guidelines
When multiple traditions are involved, scripts must transition gracefully. Provide guidance to readers or officiants on how to introduce unfamiliar elements. Use respectful language and context so guests understand the meaning behind rituals.
Incorporating Meaningful Personal Touches
Use Personal Objects and Heirlooms
Cultural traditions often welcome inclusion of personal items—scarves, instruments, jewellery, letters or tools. When these items align with custom, they deepen personal resonance. Embedded wisely, they become bridges between tradition and individual story.
Visual Displays, Genealogy, and Stories
Incorporate slideshows, photo walls, family lineage charts, or storytelling time. Even in strict tradition, interspersed personal memory allows participants to connect cultural ritual to personal history. That balance enhances emotional meaning.
Timing and Reforming Rituals for Local Context
Some traditions have rituals spaced out over days or weeks, which may not align with current practical realities.
You can condense parts while preserving the essence. For example, symbolic washing, blessing or incense can be adapted into a shorter window. Seek flexibility that honors spirit while respecting logistics.
Ensuring Emotional and Spiritual Support
Provide Space for Reflection and Grief
Rituals often move quickly; give pauses. Include moments of silence, personal reflection, prayer or private visitation so guests can mourn or meditate. Comfortable seating, shade, water and simple guidance help.
Communicate What Will Happen
Guests unfamiliar with the tradition may feel uncertain. Provide brief printed or spoken notes explaining key rites and their symbolic meaning. That helps avoid discomfort and encourages respectful participation.
Offer Follow‑Up and Connection
After the ceremony, host gatherings or rituals—tea, shared stories, community meals or memorial events. In many cultures, the farewell continues through extended rituals. These connect grieving families and nurture ongoing memory.
Frequently Asked Questions
Can a funeral incorporate multiple cultural traditions?
Yes, with sensitivity. You may include key elements from more than one tradition—such as a chanting period, symbolic water ritual, or music—if coordinated thoughtfully and with consultation. The goal is respect and coherence rather than hybrid confusion.
What if family disagrees on traditions?
When conflict arises, refer back to the deceased’s documented wishes, if available. If none exist, facilitate family discussion with cultural or religious counselors. Sometimes compromises like dual services or combining symbolic elements help bridge divides.
Are modern adaptations acceptable in traditional ceremonies?
Many traditions today accept adaptive forms—recorded music instead of live, symbolic acts in lieu of older rites, interim rituals. As long as the core meaning is preserved and community elders approve, adaptations can keep tradition alive in changing contexts.
Conclusion
Cultural traditions in farewells offer profound meaning, belonging, and continuity. A thoughtful guide to planning a meaningful farewell would reflect that heritage while allowing personal expression.
By honouring rituals through consultation, blending sensitively when needed, and embedding individual memory, your farewell can become both culturally authentic and deeply personal.
In stepping forward to plan such ceremonies, approach with humility, openness and respect. When guided by culture, heart and thoughtful consultation, farewells speak not only to loss—but to continuity, community and love.
Electrical Safety Inspections for Homes and Businesses
Every building, whether residential or commercial, relies on electrical systems to function. Over time, wear and tear, outdated components, and unapproved modifications can pose serious hazards.
This is why electrical safety inspections for homes and businesses play a vital role in maintaining safety, efficiency, and compliance.

Many property owners also use these inspections as an opportunity to upgrade meter box equipment to match current energy demands. From checking wiring conditions to identifying fire risks, these assessments ensure electrical systems are up to standard and ready to perform.
What Are Electrical Safety Inspections?
Systematic Checks by Licensed Professionals
Electrical safety inspections involve a detailed review of all electrical components on a property. This includes switchboards, wiring, circuit breakers, power points, and appliances.
A licensed electrician carries out these inspections following Australian standards, particularly AS/NZS 3000:2018, also known as the Wiring Rules.
Compliance with State and National Laws
In Australia, every state has regulations surrounding electrical safety. Homeowners and business owners must comply with these standards to avoid penalties and reduce the risk of electrical accidents.
An inspection ensures compliance and can reveal hidden issues not visible to the untrained eye.
Why You Need Electrical Safety Inspections
One of the most common causes of house fires in Australia is faulty wiring or overloaded circuits. Regular inspections can identify overheating wires, damaged insulation, and poor connections, all of which could ignite if left unchecked.
Faulty power points, frayed extension leads, and exposed wiring are major electrocution hazards. Inspections help locate these risks early, reducing the chance of injury at home or in the workplace.
If you’re planning to sell or lease your property, potential buyers and tenants often ask for evidence of electrical compliance. A recent safety report can speed up the process and increase buyer confidence.
When Should Inspections Be Scheduled?
Before Buying or Selling a Property
Scheduling an inspection before purchasing a property helps you identify hidden problems that could require expensive repairs. Sellers who conduct inspections beforehand can fix issues in advance and avoid last-minute complications.
After Storm Damage or Renovations
Severe weather can damage outdoor wiring, power poles, and fuse boxes. Renovations may also affect existing circuits. In either case, it’s best to schedule an inspection to ensure all work is safely integrated with the main system.
At Regular Intervals
For residential properties, safety inspections every five to ten years are recommended. Businesses, especially those with high energy use or operating machinery, should schedule annual checks to meet occupational health and safety obligations.
What Inspectors Look For
Wiring Conditions and Age
Outdated wiring systems, such as those using rubber or cloth insulation, pose a serious hazard. Inspectors will assess whether the existing cables meet modern safety standards and recommend rewiring if necessary.
Functionality of Switchboards
The switchboard is a critical component that distributes electricity across the property. Inspectors check for rust, burnt components, and whether the board needs an upgrade meter box to accommodate new technology or added circuits.
Performance of Safety Switches
Safety switches, also known as RCDs, protect people from electrocution by cutting off power in milliseconds during a fault. The inspector will test these devices to ensure they function correctly during simulated faults.
Condition of Power Points and Light Fittings
Loose, discoloured, or cracked outlets can indicate overheating or poor connections. Lights that flicker or fail regularly might point to deeper electrical problems. Inspections include testing voltage and ensuring fittings are secure.
Benefits for Homeowners
Peace of Mind for Families
Knowing that the home’s electrical system has been professionally inspected brings reassurance, particularly for families with children or elderly residents. The risk of fire or shock is significantly reduced when the system is in top condition.
Identifying Outdated Equipment
Many older homes still operate with outdated fuse boxes or unprotected circuits. An inspection helps homeowners plan upgrades that not only improve safety but also increase energy efficiency.
Supporting Smart Home Integration
As more Australians invest in smart appliances, including lighting systems and climate control, the demand on home wiring increases. Inspections ensure the system can handle new technology without safety risks.
Benefits for Business Owners
Meeting Workplace Safety Requirements
Business owners are legally required to provide a safe working environment. Regular electrical safety inspections are part of these obligations. Failing to conduct them can lead to penalties or lawsuits in the event of an incident.
Preventing Business Disruption
Electrical faults can lead to outages that halt operations. By identifying risks early, businesses can avoid downtime and protect equipment from power surges and failures.
Planning for Expansion
Businesses often expand their operations, bringing in more computers, tools, or lighting. Inspections help determine if the current system supports the added load or if it’s time for an upgrade.
What Happens After the Inspection?
Receiving a Detailed Report
After the inspection, you’ll receive a written report outlining the findings. This includes a list of any identified issues, recommendations for repairs, and confirmation of systems that passed the check.
Planning Upgrades and Repairs
If the report shows outdated components or faulty wiring, a follow-up visit may be scheduled to carry out repairs. Some property owners also use this time to upgrade meter box systems or install additional safety switches.
Documenting for Compliance
Keeping inspection records on file is useful for insurance claims, property sales, or demonstrating safety compliance to regulators. These documents often become part of your building’s ongoing maintenance history.
Costs and What to Expect
Typical Price Range
For residential inspections, costs usually fall between $150 and $300, depending on property size and age. For commercial buildings, pricing can range higher, especially in facilities with complex systems or multiple floors.
What’s Included
A standard inspection will cover all accessible wiring, switchboards, circuit protection, outlets, lights, and appliance connections. Some providers offer thermal imaging to detect hot spots invisible to the naked eye.
Signs You May Need an Inspection Sooner
Flickering or Dimming Lights
This may indicate a loose connection or overloaded circuit. An inspection can trace the problem and prevent worsening damage.
Circuit Breakers Tripping Often
Frequent tripping can point to appliance faults or system overloads. Instead of resetting breakers regularly, it’s better to have a professional assess the system.
Burning Smells or Warm Outlets
These are serious warning signs that should never be ignored. If you notice any of these, schedule an inspection immediately to prevent fire hazards.
Frequently Asked Questions
How Often Should a Home Be Inspected?
Homes should be inspected every five to ten years. Older homes or those with renovations may need more frequent checks. Properties with pools, spas, or external structures should also be monitored more closely.
Can I Do My Own Electrical Safety Inspection?
No. Only licensed electricians can legally carry out electrical inspections in Australia. DIY attempts are unsafe and do not meet compliance requirements.
Will the Inspection Disrupt My Power?
Power may be turned off briefly during certain tests, especially when checking safety switches. However, inspections are typically completed within a few hours and are planned to minimise inconvenience.
Conclusion
Conducting regular electrical safety inspections for homes and businesses is a necessary step in ensuring the well-being of occupants and the protection of assets.
These inspections are not only about following regulations—they provide real value by identifying problems early, preventing hazards, and guiding future upgrades.
Whether you’re preparing to sell a home, expanding a business, or simply seeking peace of mind, a safety inspection is an investment in the long-term performance and security of your property.
Coordinating these inspections with services like an upgrade meter box can further future-proof your electrical setup and align it with modern energy needs.
A professional inspection is not just a check-up—it’s a commitment to safety, compliance, and responsible property management.
Easy Accounting Tips for Non‑Finance Professionals
Many business owners, managers, and staff find accounting intimidating, especially if their background is not in finance.
Yet simplifying your accounting habits can make a big difference. In this article, you will learn easy accounting tips for non‑finance professionals that help you maintain order, avoid errors, and support business decisions.

Accounting is not just about handling numbers. It links deeply with other business activities, such as marketing, pricing, and growth planning—the same thinking you use when assessing types of promotional strategies.
By adopting a few straightforward practices, non‑finance professionals can handle bookkeeping tasks with greater confidence and reduce reliance on external help.
Start with the Basics: Records and Organisation
Keep Business and Personal Finances Separate
One of the first and simplest tips is to keep your personal and business transactions in separate accounts. Using one bank account for all expenditures complicates tracking and increases the risk of mistakes.
By separating them, you ensure clarity in your business figures and reduce the chance of mixing in non‑business expenses.
Choose a Simple Filing System
You don’t need an elaborate filing system to stay organised. Create folders or digital directories labelled clearly—such as Invoices, Receipts, Bank Statements, and Payroll.
Make it a habit to file documents immediately, so nothing piles up. This system helps when someone (or you) needs to find a past record quickly.
Use Accounting Software the Right Way
Pick a Tool You Can Understand
You don’t have to become an accountant, but selecting user‑friendly software makes a big difference.
Choose a system that has clear menus, built‑in help, and preferably local support. Many platforms let non‑finance users start with basic features and grow into more advanced ones over time.
Automate Routine Tasks
Once accounting software is in place, automate repetitive tasks. Set up bank feeds so your transactions import automatically. Automate invoicing to customers at fixed intervals. Automating these tasks reduces manual errors and saves hours each week.
Record Transactions Regularly
Don’t Let Things Accumulate
A frequent trap for non‑finance professionals is leaving bookkeeping until the end of the quarter. This leads to forgotten transactions, mismatches, and rushed entries. Instead, update your records weekly or fortnightly.
Use Mobile Apps to Capture Receipts Immediately
Many accounting systems offer mobile apps that let you photograph receipts on the spot and upload them to your ledger. This avoids losing receipts or misplacing paper. Over time, your digital archive becomes a reliable backup for audit or tax purposes.
Understand Basic Financial Reports
Focus on Profit & Loss
Profit and loss (income statement) shows your revenue, costs, and resulting profit over a period. Even if you don’t grasp every line item, you should check whether your revenue is growing relative to costs. If costs grow faster, that’s a signal to review expenses.
Watch Cash Flow Statements
Cash flow statements show money in and out of the business. A profitable business can still run into trouble if cash is tied up. Pay attention to when large payments are due or when invoices are paid late. This insight helps you anticipate liquidity problems before they arise.
Control Costs Mindfully
Regularly Review Recurring Expenses
Subscriptions, software fees, insurance, rent—many costs recur monthly or annually. Periodically review these and cancel those not delivering value. Many businesses discover savings simply by removing unused services or renegotiating deals.
Use Classifications for Expense Analysis
When recording expenses, classify them into meaningful categories (for example, Office Supplies, Travel, Utilities, Advertising). Over time, these categories help you see which areas consume the most resources and where to target cost control.
Manage Invoicing and Receivables
Clear Payment Terms from the Start
Set clear, concise payment terms on every invoice—due date, late fee, acceptable payment methods. For non‑finance professionals, being explicit avoids confusion or delays. Clients respond better when they know what is expected.
Follow Up Promptly on Overdue Payments
Don’t allow overdue invoices to linger indefinitely. Track them and follow up quickly with reminders. Even a polite email or phone call can prompt payment. The longer a debt remains unpaid, the harder it becomes to collect.
Reconcile Bank Accounts Regularly
Match Ledger to the Bank Statement
Reconciling means comparing your ledger entries with actual bank statements to ensure everything aligns. Doing this monthly ensures discrepancies are caught early. If you discover differences, investigate immediately rather than letting them accumulate.
Investigate and Correct Discrepancies
If an entry is missing or duplicated, trace it back to the original source—invoice, payment record, or bank charge. Fixing errors quickly keeps your books trustworthy. Regular reconciliation also gives you more confidence in the financial reports you review.
Maintain Compliance with Taxes and Regulations
Stay on Top of GST, PAYG, and Super
Even as a non‑finance professional, you must know your tax obligations. If your business is GST-registered, ensure you collect and remit GST correctly.
If you employ staff or directors, you must withhold PAYG and pay superannuation on time. Missing these obligations can result in penalties.
Keep Records for the Required Time
Tax and regulatory authorities require that you retain financial records—such as invoices, receipts, payroll files—for a set number of years (often five years). Even if they are digital, they must be legible and accessible. Having a reliable archive supports compliance and audit readiness.
Use Support When Needed
Seek Help for Complex Areas
You don’t have to manage every financial detail yourself. For complex topics—like depreciation, foreign transactions, or trust structures—work with a qualified accountant. Your role is not to become an expert in every area but to recognise when expert input is needed.
Train Your Team or Delegate
If there are staff involved in financial tasks, providing basic training in bookkeeping practices improves quality. Delegating simple tasks, like data entry or invoice generation, frees you to focus on business strategy while maintaining financial integrity.
Develop Financial Awareness Over Time
Build Confidence Through Familiarity
Accounting may feel foreign at first, but regular interaction with financial tasks builds confidence. Set aside time each month to review your financial records, understand where the money is going, and assess how expenses align with income.
As your comfort grows, explore new areas such as basic budgeting, margin analysis, or forecasting. These aren’t just reserved for finance professionals—they support better decision-making across marketing, operations, and sales.
Many business owners find financial knowledge helpful when evaluating new projects or adjusting service pricing.
You don’t need to learn everything at once. Start with the fundamentals and expand slowly. If you’re working with a bookkeeper or accountant, ask them to explain unfamiliar terms or concepts.
This approach leads to steady improvement in financial awareness and helps you manage your business with more control and less guesswork.
Frequently Asked Questions
How often should I check my bookkeeping?
It’s wise to check your bookkeeping at least once a week or fortnightly. Frequent checks reduce backlog and errors. If your business has many transactions, daily review may be beneficial. Consistency matters more than frequency.
Can accounting software replace a bookkeeper?
Software is a powerful tool but it doesn’t substitute judgement or oversight. Errors still occur—duplicate entries, misclassifications, or missed reconciliations. A bookkeeper or accountant ensures accuracy, corrects anomalies, and ensures compliance.
What financial reports should non-finance professionals review?
Start with the profit & loss statement and cash flow statement. These give insights into revenue, costs, and liquidity. Over time you might add balance sheets, budgets, or cost reports. Focus on those that help guide your decisions.
Conclusion
For those without a financial background, adopting easy accounting tips for non‑finance professionals helps build control and confidence.
By organising records, using appropriate software, and embracing regular routines, you reduce errors, improve reporting, and create clarity.
Efficient bookkeeping supports growth, helps maintain compliance, and informs strategic decisions. When you combine disciplined habits with expert help when needed, your business finances become a strength—not a burden.
The Importance of Ground Fault Circuit Interrupters (GFCIs) in Wet Areas
Electrical safety in wet areas is paramount, particularly in environments like kitchens, bathrooms, and outdoor spaces where water and electricity can mix. The risk of electrical shocks in these areas is much higher due to the conductive nature of water.
Ground Fault Circuit Interrupters (GFCIs) are specifically designed to reduce these risks by cutting off the power supply when they detect ground faults or leakage currents, preventing accidents.

Understanding the importance of GFCIs in wet areas is essential for both safety and compliance with electrical codes.
If you’re unsure about your home’s electrical safety, consulting an electrician Lakes Entrance can help ensure your system is properly equipped with GFCIs and other safety measures.
What is a Ground Fault Circuit Interrupter (GFCI)?
A Ground Fault Circuit Interrupter (GFCI) is a safety device designed to protect people from electrical shock by detecting differences in the current flowing through a circuit.
If a ground fault occurs, meaning the electrical current is flowing through an unintended path, such as water or a person’s body, the GFCI will quickly cut the power to the circuit.
How GFCIs Work
GFCIs continuously monitor the flow of electricity in a circuit. When they detect a difference in the incoming and outgoing current (as small as 5 milliamps), they immediately shut off the power.
This rapid response time significantly reduces the risk of serious injury or death from electric shock.
Types of GFCIs
Receptacle GFCIs
These are the most common type and replace standard outlets. They are installed where electrical outlets are exposed to water sources.
Circuit Breaker GFCIs
These GFCIs are built into the circuit breaker panel and protect an entire circuit.
Portable GFCIs
These are used for temporary applications and are often used with extension cords in wet or outdoor environments.
Why GFCIs Are Vital in Wet Areas
Wet areas are particularly hazardous when it comes to electricity. Water is a great conductor of electricity, and wet conditions increase the risk of electrical faults. GFCIs play a critical role in reducing these risks in areas where moisture is common.
1. Reducing the Risk of Electrical Shock
The primary reason GFCIs are necessary in wet areas is to prevent electrical shock. When water comes into contact with an electrical device or wiring, it can create a path for the electrical current to flow into the body, leading to a potentially fatal shock.
GFCIs detect even small discrepancies in electrical flow, cutting off power before serious harm can occur.
Why GFCIs Are Effective at Preventing Shock:
Sensitive Detection
GFCIs can detect imbalances in current, such as when electricity flows through a person, and react within milliseconds.
Prevents Fatal Incidents
By shutting off the power quickly, GFCIs significantly lower the chance of injury or death from electric shock in wet environments.
2. Essential in Kitchens and Bathrooms
Kitchens and bathrooms are two areas in the home where water and electricity are most likely to come into contact.
These areas are frequently exposed to water from sinks, tubs, or showers, which increases the chance of accidents. Installing GFCIs in these spaces is not only a safety measure but also a requirement under many electrical codes.
Key Locations for GFCIs in Wet Areas:
Kitchen
GFCIs should be installed near sinks, counter spaces, and appliances like dishwashers and microwaves.
Bathroom
All outlets near sinks, bathtubs, or showers should have GFCIs to protect against shock hazards.
Laundry Areas
Washers, dryers, and utility sinks should also be GFCI-protected to prevent electrical hazards.
3. Preventing Damage to Electrical Appliances
Water can damage electrical appliances and systems, causing short circuits, overheating, and even fires. GFCIs not only protect people but also prevent appliances from suffering damage when there is a fault.
For instance, if an appliance malfunctions and causes a leakage current to flow, the GFCI will cut off the power before significant damage occurs.
How GFCIs Protect Appliances:
Prevents Short Circuits
If water or moisture causes a short circuit in an appliance, the GFCI cuts power to prevent further damage.
Prevents Overheating
GFCIs detect anomalies in the current flow that might lead to overheating of wires or appliances.
The Role of GFCIs in Outdoor Areas
Outdoors, the combination of rain, humidity, and water-saturated ground makes electrical systems particularly vulnerable.
Whether you’re using outdoor outlets for holiday lights or powering equipment like lawn mowers, GFCIs are essential in outdoor areas to keep everyone safe.
1. Weather Resistance
GFCIs are designed to be weather-resistant, making them suitable for outdoor installation.
When used in outdoor areas like garages, patios, or gardens, they help to ensure that any electrical leakage due to water exposure is immediately addressed, preventing shocks and injuries.
2. Required for Pool and Spa Areas
Pool and spa areas are particularly dangerous places for electrical hazards. With water being an excellent conductor of electricity, a fault in the electrical system near the water can lead to fatal electrocution.
For this reason, GFCIs are mandatory for all outlets within a certain distance from swimming pools, spas, or hot tubs.
Installing GFCIs: What You Need to Know
Installing GFCIs in wet areas requires professional knowledge, as it involves working with your home’s electrical system. To ensure proper installation and compliance with safety standards, it’s best to hire a licensed electrician.
1. Compliance with Local Building Codes
In many regions, electrical codes require GFCIs to be installed in wet areas. For example, the Australian Standards (AS/NZS 3000:2018) dictate the necessity of GFCI protection in areas where water and electricity might come into contact.
Failure to comply with these codes could result in unsafe living conditions and issues with insurance claims or home sales.
2. Professional Installation
Because GFCIs must be wired properly to function correctly, it is essential to have a licensed electrician perform the installation. A professional will ensure the device is wired and tested to meet all electrical safety requirements.
Conclusion
Ground Fault Circuit Interrupters (GFCIs) play an essential role in protecting people, appliances, and homes from the dangers of electrical faults in wet areas.
They provide immediate protection by detecting any electrical leakage and cutting off power before a potentially fatal shock can occur.
Whether in kitchens, bathrooms, outdoor spaces, or pool areas, GFCIs are vital for safety. Always ensure that your GFCIs are installed correctly by a qualified electrician Lakes Entrance and test them regularly to maintain your home’s electrical safety.
Frequently Asked Questions
How do I know if I need a GFCI?
If your outlets are located near water sources, such as sinks, showers, bathtubs, or outdoor areas, you should have GFCIs installed. This is especially important in bathrooms, kitchens, and laundry rooms, where water and electricity can easily mix.
Can I install a GFCI myself?
While it is possible for experienced DIYers to install a GFCI, it is highly recommended to hire a licensed electrician to ensure it is installed safely and in compliance with local electrical codes. Incorrect installation can lead to malfunction or electrical hazards.
How do I test my GFCI?
To test your GFCI, press the “Test” button on the outlet. This should cause the outlet to trip, cutting off power. To reset the GFCI, simply press the “Reset” button. It’s recommended to test the GFCI monthly to ensure it functions properly.
Safe Practices for DIY Tree Cutting and Removal
Cutting and removing a tree may seem like a straightforward task, but it requires a great deal of skill and careful planning to avoid accidents or damage.
Whether you have a small tree in your yard or need to clear a larger one, understanding the safe practices for DIY tree cutting and removal is essential for ensuring both your safety and the wellbeing of your property.

This guide will provide key safety tips, tools, and techniques for tree cutting. Additionally, if you’re dealing with root problems and wondering how to kill roots of a tree, we will discuss that too.
Why Tree Cutting and Removal Requires Care
While it may be tempting to tackle tree removal yourself to save on costs, it is important to realise that it can be hazardous. Tree cutting involves the risk of falling branches, swinging chainsaws, and unstable trees.
A lack of knowledge can result in serious injury or damage to property. Furthermore, removing a tree is not always as simple as it appears. Factors like the tree’s size, location, and health will all influence the removal process.
Understanding these risks is the first step in ensuring a safe and successful tree removal process.
Essential Tools for DIY Tree Cutting
Before attempting to cut down a tree, you must have the right tools on hand. Using improper equipment can not only make the task more difficult but also increase the likelihood of accidents. Here is a list of the basic tools required for tree cutting and removal:
1. Chainsaw
A chainsaw is the most common and effective tool for cutting down trees, particularly larger ones. It provides the power needed to make clean cuts quickly and efficiently. For smaller trees, a pruning saw or handsaw may suffice.
Things to remember when using a chainsaw:
Ensure the chainsaw is in good condition and sharpened regularly. Use the correct size chainsaw for the tree you plan to cut. Familiarise yourself with the operating instructions and safety features.
2. Safety Gear
Safety should be your top priority when cutting down a tree. The following safety equipment is essential for protecting yourself from injury:
- Helmet with face shield or goggles: Protects your head and eyes from falling debris.
- Hearing protection: Chainsaws are loud and prolonged exposure can damage your hearing.
- Protective clothing: Wear long sleeves, pants, and chainsaw chaps to protect against cuts.
- Sturdy boots: Essential for stability and protecting your feet from falling branches or tools.
3. Ropes and Wedges
Ropes can help guide the tree as it falls, ensuring that it lands in a safe area. Wedges can also be used to control the direction in which the tree falls, especially if the tree is leaning.
Ropes and wedge tips
Always use strong, durable ropes designed for tree cutting. Place wedges on the opposite side of the tree’s lean to help direct the fall.
4. Pruning Tools
Before cutting down the main trunk, you may need to prune branches to reduce the weight and make the process easier. Pruning shears, loppers, and pole saws are useful for removing small branches and clearing the area around the tree.
Step-by-Step Guide to Safe Tree Cutting
Once you have the necessary tools and safety equipment, it’s time to plan the tree cutting process. Follow these steps to ensure you complete the task safely and effectively.
1. Assess the Tree and the Area
Before you start cutting, carefully assess the tree and its surroundings. Consider the following:
- Tree health: Check if the tree is diseased or dying. A diseased tree can be unstable and difficult to predict during cutting.
- Tree lean: If the tree is leaning in a particular direction, it is essential to plan the cut accordingly to prevent it from falling the wrong way.
- Surrounding obstacles: Ensure there are no structures, power lines, or other trees in the way. This will help you avoid damage and injury.
How to assess a tree:
- Inspect the tree for cracks, signs of disease, or leaning.
- Look for any objects or structures that the tree might hit when it falls.
- Ensure that you have a clear escape route if the tree starts to fall unexpectedly.
2. Make the Notch Cut
The notch cut is the first cut you make on the tree and is crucial for controlling the direction of the fall. The notch should be made on the side of the tree facing the direction you want it to fall.
This cut should be made at a 70-degree angle and should be about one-third of the way through the tree.
3. Make the Felling Cut
Once the notch cut is complete, you can proceed with the felling cut. The felling cut is made on the opposite side of the notch and slightly above it. This cut should be horizontal and should be about 2.5 cm higher than the horizontal part of the notch.
4. Use Wedges for Direction Control
If the tree is not falling in the desired direction, wedges can be inserted into the felling cut to help direct its fall. Gently tap the wedges with a hammer to push the tree in the right direction.
5. Retreat and Wait for the Tree to Fall
As the tree begins to lean, it’s time to step back and move to a safe distance. Trees can fall unexpectedly, so always make sure you have a clear escape route. Keep in mind that it’s best to retreat at a 45-degree angle from the direction of the fall.
Removing the Tree Stump and Roots
Once the tree has fallen, you may need to remove the stump and roots. Stump removal can be a complicated process, as the roots may spread deep into the soil.
If you’re dealing with stubborn roots, you might wonder how to kill roots of a tree. Here are some methods for dealing with tree stumps and roots:
1. Manual Removal
You can use an axe, shovel, or digging bar to manually remove the stump and roots. This method can be very labour-intensive, especially for larger trees, but it is the most cost-effective.
2. Chemical Removal
If you’re looking to speed up the process, you may choose to apply a tree root killer product. These chemicals break down the root system, allowing you to remove the stump more easily.
3. Grinding
Stump grinders are powerful machines that can grind the tree stump down below the soil level, leaving you with a smooth surface. These are available for rent or can be used by a professional arborist.
Conclusion
Cutting and removing a tree on your property is a task that should never be taken lightly. While DIY tree cutting can save you money, it requires the right tools, safety precautions, and techniques.
Always assess the tree and its surroundings before starting and ensure you have the right equipment and protective gear. If the task seems beyond your capabilities, consider hiring a professional arborist to handle the job safely.
Whether you’re dealing with a small tree or need help with root removal, following these safe practices will help you achieve your goal without unnecessary risks.
Frequently Asked Questions
How do I know if I can cut down a tree myself?
If the tree is small and healthy, you may be able to cut it down yourself using the proper equipment. However, if the tree is large, leaning, or diseased, it’s best to call a professional arborist.
What should I do if the tree is near power lines?
If the tree is near power lines, it’s best to hire a professional tree removal service. Cutting near power lines is extremely dangerous, and safety protocols must be followed.
How do I safely dispose of a large tree stump?
You can either remove the stump manually, grind it down, or apply chemicals to kill the roots. If the stump is large, it’s often best to hire a professional service for stump removal.
DIY Soakwell Installation: Step-by-Step Instructions for Homeowners
If you’re looking for a practical and cost-effective way to manage stormwater runoff around your home, installing a soakwell could be the solution you need.
Soakwells collect and store excess water, allowing it to gradually seep into the ground, reducing the risk of flooding and water damage. With a bit of preparation and the right tools, many homeowners can complete the installation of a soakwell themselves.
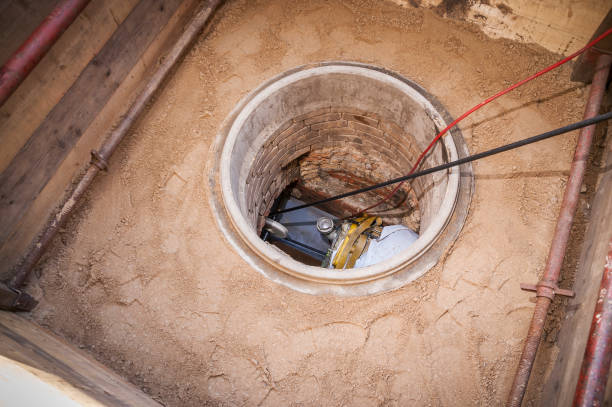
This guide provides step-by-step instructions for DIY soakwell installation, helping you protect your property from water damage while saving on professional installation costs.
Before beginning, it’s important to understand the soakwell distance from house. Installing your soakwell too close to your foundation could lead to potential water-related issues, so make sure to follow all necessary spacing guidelines.
What Is a Soakwell and Why Is It Important?
Definition of a Soakwell
A soakwell is an underground storage device designed to capture excess stormwater and allow it to be absorbed into the ground.
This system is essential for preventing surface water from pooling around your property, which can cause damage to foundations, landscaping, and surrounding areas. Soakwells are especially useful in areas that experience frequent rainfall or poor drainage.
Benefits of Installing a Soakwell
Prevents Flooding: Soakwells help manage water runoff during heavy rainfall, preventing flooding around your property.
Protects Landscaping: Proper water drainage protects your garden and lawn from waterlogging and soil erosion.
Maintains Structural Integrity: Keeping water away from the foundation of your home reduces the risk of cracks and shifting caused by water damage.
Materials and Tools Needed for DIY Soakwell Installation
Before starting the installation, make sure you have all the necessary materials and tools. Here is a list of the items you will need:
Materials Required:
- Soakwell unit (plastic or concrete)
- Gravel or coarse sand
- Geotextile fabric (optional)
- PVC piping for connecting to downspouts
- Soil or backfill for covering the soakwell
Tools Needed:
- Shovel
- Spade or post-hole digger
- Level
- Measuring tape
- Wheelbarrow
- Gloves and safety goggles
- Bucket or hose for water testing
Step 1: Planning the Soakwell Location
Choosing the Right Spot
The first step in installing a soakwell is selecting an appropriate location on your property. You’ll need to choose a spot that allows for proper drainage and doesn’t interfere with your home’s foundation.
Keep in mind the soakwell distance from house as it should be installed at least 1.5 to 2 metres away from the foundation to prevent water pooling too close to the structure.
Consideration of Local Regulations
Before proceeding with the installation, check with your local council for any regulations regarding stormwater management and soakwell installation.
Some areas have specific rules about the size, depth, and placement of soakwells, so it’s essential to confirm that your plans comply with local building codes.
Assessing Water Flow
Observe how water flows across your property during heavy rainfall. Identify areas where water accumulates, and choose a location where the soakwell can effectively capture and store runoff.
Ensure that the site is downhill from water sources like gutters or downspouts to allow for proper drainage.
Step 2: Digging the Hole for the Soakwell
Preparing the Site
Once you have selected the appropriate location, the next step is to dig the hole where the soakwell will be placed.
The size of the hole will depend on the size of the soakwell you’ve chosen, but it should be deep enough to accommodate the soakwell unit and leave space for surrounding gravel.
Key Steps for Digging:
- Mark the area where you plan to dig using spray paint or stakes.
- Dig carefully, making sure the hole is wide enough and deep enough for the soakwell unit.
- Use a shovel or post-hole digger to create the hole and level the bottom to ensure the soakwell sits securely.
Step 3: Installing the Soakwell
Preparing the Soakwell
Before placing the soakwell into the hole, it’s important to prepare the unit. If you’re using a plastic soakwell, ensure that it is positioned with the inlet pipe facing towards the downspout.
For concrete soakwells, check that the unit is clean and free from debris that could block the water flow.
Steps for Installation:
- Place the soakwell into the hole, ensuring it sits level.
- If necessary, add a layer of gravel or coarse sand at the bottom of the hole to improve drainage and provide additional support.
- Use a level to check that the soakwell is perfectly horizontal.
Connecting the Soakwell to the Downspout
Once the soakwell is in place, you’ll need to connect it to the downspout or stormwater pipe. This is an important step to ensure that the system effectively collects stormwater runoff.
Steps for Connection:
- Use PVC pipes to connect the downspout to the soakwell. Ensure the pipe is directed into the soakwell’s inlet.
- If you’re using a flexible connector, make sure it is securely attached to prevent leaks.
- Check that the pipe is slightly sloped to allow water to flow towards the soakwell naturally.
Step 4: Backfilling and Testing
Backfilling Around the Soakwell
Once the soakwell is in place and the pipe is connected, the next step is to backfill the hole with soil or gravel. Start by filling around the sides of the soakwell with gravel to enhance drainage. Then, backfill the top with soil to level the ground and restore the landscape.
Key Points for Backfilling:
- Avoid packing the soil too tightly around the soakwell to allow for proper water absorption.
- If necessary, cover the top of the soakwell with geotextile fabric to prevent soil from washing into the soakwell.
Testing the System
After backfilling, it’s time to test the system. Pour water into the downspout and check if it flows into the soakwell as expected. Ensure that the water is absorbed into the ground and that no water is pooling around the soakwell or your property.
Step 5: Final Checks and Maintenance
Inspecting the System
Once your soakwell is installed and tested, make sure that everything is functioning properly. Check for any leaks or areas where water may be pooling. Inspect the downspout connection to ensure it is secure and that water flows freely into the soakwell.
Regular Maintenance
To keep the soakwell functioning effectively, it’s essential to maintain the system. Regularly check the soakwell for blockages, clean the downspouts, and ensure that the inlet is free from debris.
It’s also important to check the surrounding area for any soil erosion or settling that may occur over time.
Conclusion
Installing a soakwell can be a rewarding DIY project that improves your property’s stormwater management and protects your home from water damage.
By following these step-by-step instructions, you can ensure that your soakwell system is installed correctly, providing long-term benefits for your home and landscape.
Whether you’re preventing flooding or protecting your foundation, a well-installed soakwell offers a practical solution to managing excess water runoff.
Frequently Asked Questions
How far should the soakwell be from my house?
A soakwell should be installed at least 1.5 to 2 metres away from your home’s foundation to prevent water from pooling around the base of the house. This distance ensures that water does not seep into the structure.
Can I install a soakwell by myself?
Yes, installing a soakwell is a manageable DIY project for most homeowners, provided you follow the correct procedures and have the necessary tools. If you’re uncertain, however, consulting with a professional can ensure proper installation.
How often should I check my soakwell?
It’s recommended to inspect your soakwell at least once a year, especially after heavy rainfall. Regular checks will help prevent blockages and ensure the system remains effective.


