
If you’re looking for a practical and cost-effective way to manage stormwater runoff around your home, installing a soakwell could be the solution you need.
Soakwells collect and store excess water, allowing it to gradually seep into the ground, reducing the risk of flooding and water damage. With a bit of preparation and the right tools, many homeowners can complete the installation of a soakwell themselves.
This guide provides step-by-step instructions for DIY soakwell installation, helping you protect your property from water damage while saving on professional installation costs.
Before beginning, it’s important to understand the soakwell distance from house. Installing your soakwell too close to your foundation could lead to potential water-related issues, so make sure to follow all necessary spacing guidelines.
What Is a Soakwell and Why Is It Important?
Definition of a Soakwell
A soakwell is an underground storage device designed to capture excess stormwater and allow it to be absorbed into the ground.
This system is essential for preventing surface water from pooling around your property, which can cause damage to foundations, landscaping, and surrounding areas. Soakwells are especially useful in areas that experience frequent rainfall or poor drainage.
Benefits of Installing a Soakwell
Prevents Flooding: Soakwells help manage water runoff during heavy rainfall, preventing flooding around your property.
Protects Landscaping: Proper water drainage protects your garden and lawn from waterlogging and soil erosion.
Maintains Structural Integrity: Keeping water away from the foundation of your home reduces the risk of cracks and shifting caused by water damage.
Materials and Tools Needed for DIY Soakwell Installation
Before starting the installation, make sure you have all the necessary materials and tools. Here is a list of the items you will need:
Materials Required:
- Soakwell unit (plastic or concrete)
- Gravel or coarse sand
- Geotextile fabric (optional)
- PVC piping for connecting to downspouts
- Soil or backfill for covering the soakwell
Tools Needed:
- Shovel
- Spade or post-hole digger
- Level
- Measuring tape
- Wheelbarrow
- Gloves and safety goggles
- Bucket or hose for water testing
Step 1: Planning the Soakwell Location
Choosing the Right Spot
The first step in installing a soakwell is selecting an appropriate location on your property. You’ll need to choose a spot that allows for proper drainage and doesn’t interfere with your home’s foundation.
Keep in mind the soakwell distance from house as it should be installed at least 1.5 to 2 metres away from the foundation to prevent water pooling too close to the structure.
Consideration of Local Regulations
Before proceeding with the installation, check with your local council for any regulations regarding stormwater management and soakwell installation.
Some areas have specific rules about the size, depth, and placement of soakwells, so it’s essential to confirm that your plans comply with local building codes.
Assessing Water Flow
Observe how water flows across your property during heavy rainfall. Identify areas where water accumulates, and choose a location where the soakwell can effectively capture and store runoff.
Ensure that the site is downhill from water sources like gutters or downspouts to allow for proper drainage.
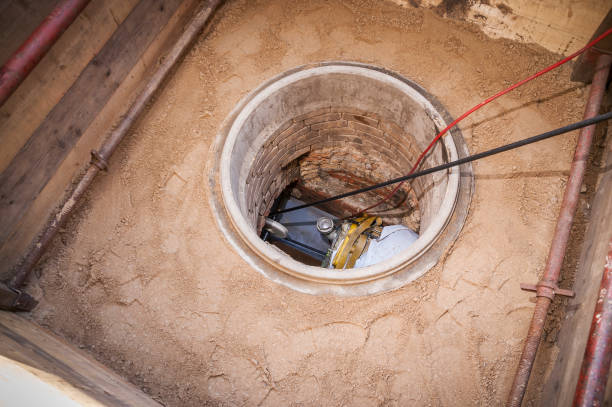
Step 2: Digging the Hole for the Soakwell
Preparing the Site
Once you have selected the appropriate location, the next step is to dig the hole where the soakwell will be placed.
The size of the hole will depend on the size of the soakwell you’ve chosen, but it should be deep enough to accommodate the soakwell unit and leave space for surrounding gravel.
Key Steps for Digging:
- Mark the area where you plan to dig using spray paint or stakes.
- Dig carefully, making sure the hole is wide enough and deep enough for the soakwell unit.
- Use a shovel or post-hole digger to create the hole and level the bottom to ensure the soakwell sits securely.
Step 3: Installing the Soakwell
Preparing the Soakwell
Before placing the soakwell into the hole, it’s important to prepare the unit. If you’re using a plastic soakwell, ensure that it is positioned with the inlet pipe facing towards the downspout.
For concrete soakwells, check that the unit is clean and free from debris that could block the water flow.
Steps for Installation:
- Place the soakwell into the hole, ensuring it sits level.
- If necessary, add a layer of gravel or coarse sand at the bottom of the hole to improve drainage and provide additional support.
- Use a level to check that the soakwell is perfectly horizontal.
Connecting the Soakwell to the Downspout
Once the soakwell is in place, you’ll need to connect it to the downspout or stormwater pipe. This is an important step to ensure that the system effectively collects stormwater runoff.
Steps for Connection:
- Use PVC pipes to connect the downspout to the soakwell. Ensure the pipe is directed into the soakwell’s inlet.
- If you’re using a flexible connector, make sure it is securely attached to prevent leaks.
- Check that the pipe is slightly sloped to allow water to flow towards the soakwell naturally.
Step 4: Backfilling and Testing
Backfilling Around the Soakwell
Once the soakwell is in place and the pipe is connected, the next step is to backfill the hole with soil or gravel. Start by filling around the sides of the soakwell with gravel to enhance drainage. Then, backfill the top with soil to level the ground and restore the landscape.
Key Points for Backfilling:
- Avoid packing the soil too tightly around the soakwell to allow for proper water absorption.
- If necessary, cover the top of the soakwell with geotextile fabric to prevent soil from washing into the soakwell.
Testing the System
After backfilling, it’s time to test the system. Pour water into the downspout and check if it flows into the soakwell as expected. Ensure that the water is absorbed into the ground and that no water is pooling around the soakwell or your property.
Step 5: Final Checks and Maintenance
Inspecting the System
Once your soakwell is installed and tested, make sure that everything is functioning properly. Check for any leaks or areas where water may be pooling. Inspect the downspout connection to ensure it is secure and that water flows freely into the soakwell.
Regular Maintenance
To keep the soakwell functioning effectively, it’s essential to maintain the system. Regularly check the soakwell for blockages, clean the downspouts, and ensure that the inlet is free from debris.
It’s also important to check the surrounding area for any soil erosion or settling that may occur over time.
Conclusion
Installing a soakwell can be a rewarding DIY project that improves your property’s stormwater management and protects your home from water damage.
By following these step-by-step instructions, you can ensure that your soakwell system is installed correctly, providing long-term benefits for your home and landscape.
Whether you’re preventing flooding or protecting your foundation, a well-installed soakwell offers a practical solution to managing excess water runoff.
Frequently Asked Questions
How far should the soakwell be from my house?
A soakwell should be installed at least 1.5 to 2 metres away from your home’s foundation to prevent water from pooling around the base of the house. This distance ensures that water does not seep into the structure.
Can I install a soakwell by myself?
Yes, installing a soakwell is a manageable DIY project for most homeowners, provided you follow the correct procedures and have the necessary tools. If you’re uncertain, however, consulting with a professional can ensure proper installation.
How often should I check my soakwell?
It’s recommended to inspect your soakwell at least once a year, especially after heavy rainfall. Regular checks will help prevent blockages and ensure the system remains effective.